· Yogesh Mali · programming · 5 min read
Scaling Bull Jobs In NestJS Application
Learn how to scale bull job workers horizontally for high throughput processing in NestJS applications.
In one of my previous posts, I showed how to use Bull Queues in a NestJS application. In this post, I will show how to scale Bull job workers horizontally.
Contents
Introduction
When working with background jobs in a NestJS application, you might need to process a large number of jobs. Bull queues allow us to process jobs asynchronously, but sometimes you need more throughput. This is where scaling workers comes in.
By running multiple instances of workers, we can process jobs in parallel and achieve higher throughput.
Scenario
We have a NestJS application that will upload a file. This file will have data in JSON format. Once the file is uploaded, we will add a job to bull queue file-upload-queue. This job will read all the data from the file and for each record in the file, it will add that as a separate job in another bull queue file-data-queue.
We will have multiple workers to process file data. Each worker will process a separate job that is there in the bull queue.
Adding a single job
Let’s start with a single job first. I will not be covering any fundamentals about Bull Queues and workers. I previously wrote about worker pattern.
Nevertheless, we have a NestJS application with an API to upload a file. This API will create the first job in the queue file-upload-queue as follows:
@Post('/uploadFile')
@UseInterceptors(FileInterceptor("csv", {
  storage: diskStorage({
    destination: './csv',
    fileName: (req, file, cb) => {
      const randomName = Array(32).fill(null).map(() => (Math.round(Math.random() * 16).toString(16))).join('');
      cb(null, `${randomName}${extname(file.originalname)}`);
    }
  })
}))
async uploadLargeCsvFile(@UploadedFile() file): Promise<any> {
  const job = await this.fileQueue.add('process-file', {file: file});
  console.log(`created job ${ job.id}`);
  await this.fileQueue.close();
}
Above code basically adds a job to file-upload-queue to process that file.
Adding multiple jobs
One of the features that bull library offers to add multiple jobs to a queue. In our example, we read the data from file and we add each record as a job to another bull queue. This allows us to add multiple jobs to queue file-data-queue.
import { InjectQueue, Process, Processor } from "@nestjs/bull";
import { Job, Queue } from "bull";

const csv = require('csvtojson');

@Processor('file-upload-queue')
export class FileUploadProcessor{

    constructor(@InjectQueue('file-data-queue') private fileDataQueue: Queue) {}

    @Process('process-file')
    async processFile(job: Job) {
        const file = job.data.file;
        const filePath = file.path;
        const userData = await csv().fromFile(filePath);

        await this.fileDataQueue.addBulk(userData.map(user => ({
            name: 'process-data',
            data: user
        })));

        console.log('file uploaded successfully');
    }

}
We use addBulk functionality to add all the records from the file to queue file-data-queue.
Worker
Creating a worker through NestJS framework is simple. NestJS has a feature to run standalone application. We will use the same to run our workers while creating a separate module to process jobs from file-data-queue.
Our separate module FileDataModule will have a processor to process each record from the file.
import { Process, Processor } from "@nestjs/bull";
import { Job } from "bull";


@Processor('file-data-queue')
export class FileDataProcessor{


    @Process('process-data')
    async processFile(job: Job) {
        const data = job.data;

        console.log('processing data for a single user');
        console.log(data);

        // To-Do add some processing like inserting this data in DB
    }

}
We will use createApplicationContext to create a worker for FileDataModule like below:
import { NestFactory } from "@nestjs/core";
import { FileDataModule } from "src/file-read/file-data.module";

async function main() {
    const app = await NestFactory.createApplicationContext(FileDataModule,
        {
            bufferLogs: true,
            abortOnError: false,
        }
    );
    app.enableShutdownHooks();
    await app.init();
    console.log(`Worker started`);

    process.on('SIGINT', async () => {
        console.log(`SIGINT signal received`);
        try {
            console.log('closing app...');
            await app.close();
            console.log(`Worker stopped`);
        } catch (error) {
            console.error(`Error during shutdown: ${error.message}`);

        } finally {
            console.log('exiting...');
            process.exit(0);
        }
    });
}

main();
This worker basically starts the application and waits for SIGINT signal to be terminated. Considering this worker is create the application context for FileDataModule, it uses the processor FileDataProcessor to process data from the queue.
Scaling Workers
We will run two instances of the worker we created above. We will also be running our NestJS Application and if we have imported FileDataModule in our main application module, we will have three instances of FileDataProcessor running to process the jobs from the bull queue file-data-queue.
There are two concepts to understand in Bull Queue since bull can offer either.
Parallelism
In Parallelism, two or more tasks run in parallel, independent of each other. The simplest way to understand this is when you have multiple machines running and each performing its own task.
Concurrency
Two or more tasks runs at the same time while diving the available CPU so that all the tasks can advance in their processing.
Concurrency might not increase the throughout, but parallelism will. Parallelism also scales linearly that means if you add more workers, more jobs will get processed.
Bull offers configuration for concurrency. But in this demo, we are focusing on parallelism.
Demo
We have already described the scenario. We have a NestJS application with an API to upload a file is running in one terminal. We have two workers running in two other terminals.
We upload the file through Postman with our API. This API will create the first job. Processor for this job then adds multiple jobs to another queue file-data-queue.
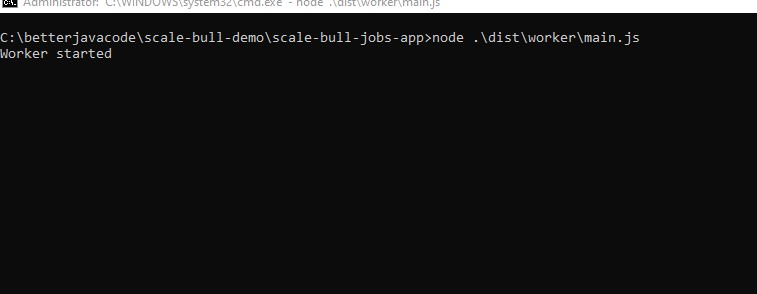
The NestJS application and the two workers then process jobs from this queue in parallel. The three screenshots below show the application, the worker 1 and the worker 2.
Conclusion
In this post, I showed how to scale bull job workers horizontally. This allows us to process jobs with high throughput. By running multiple worker instances, we can leverage parallelism to process more jobs simultaneously and improve the overall performance of our application.